FLASH LASH BUNDLE (WHISPY)

FLASH LASH BUNDLE (WHISPY)

$99.00
$139.00

The Ultimate DIY Lash Bundle

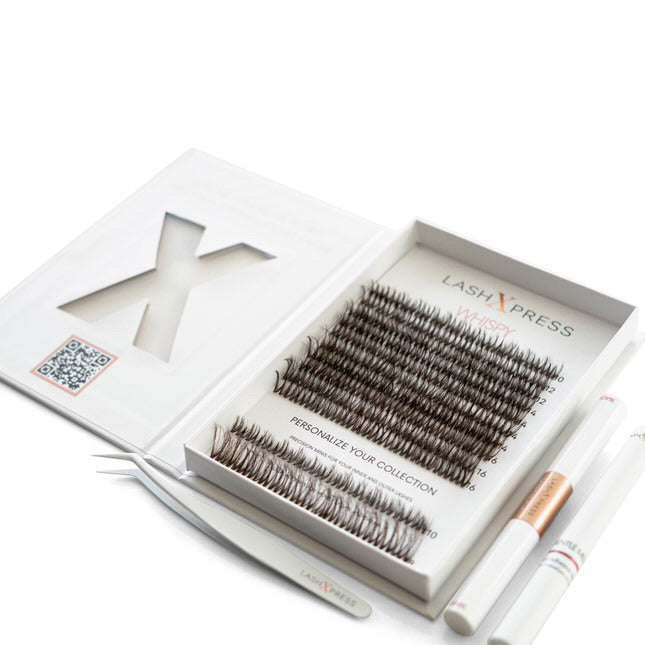
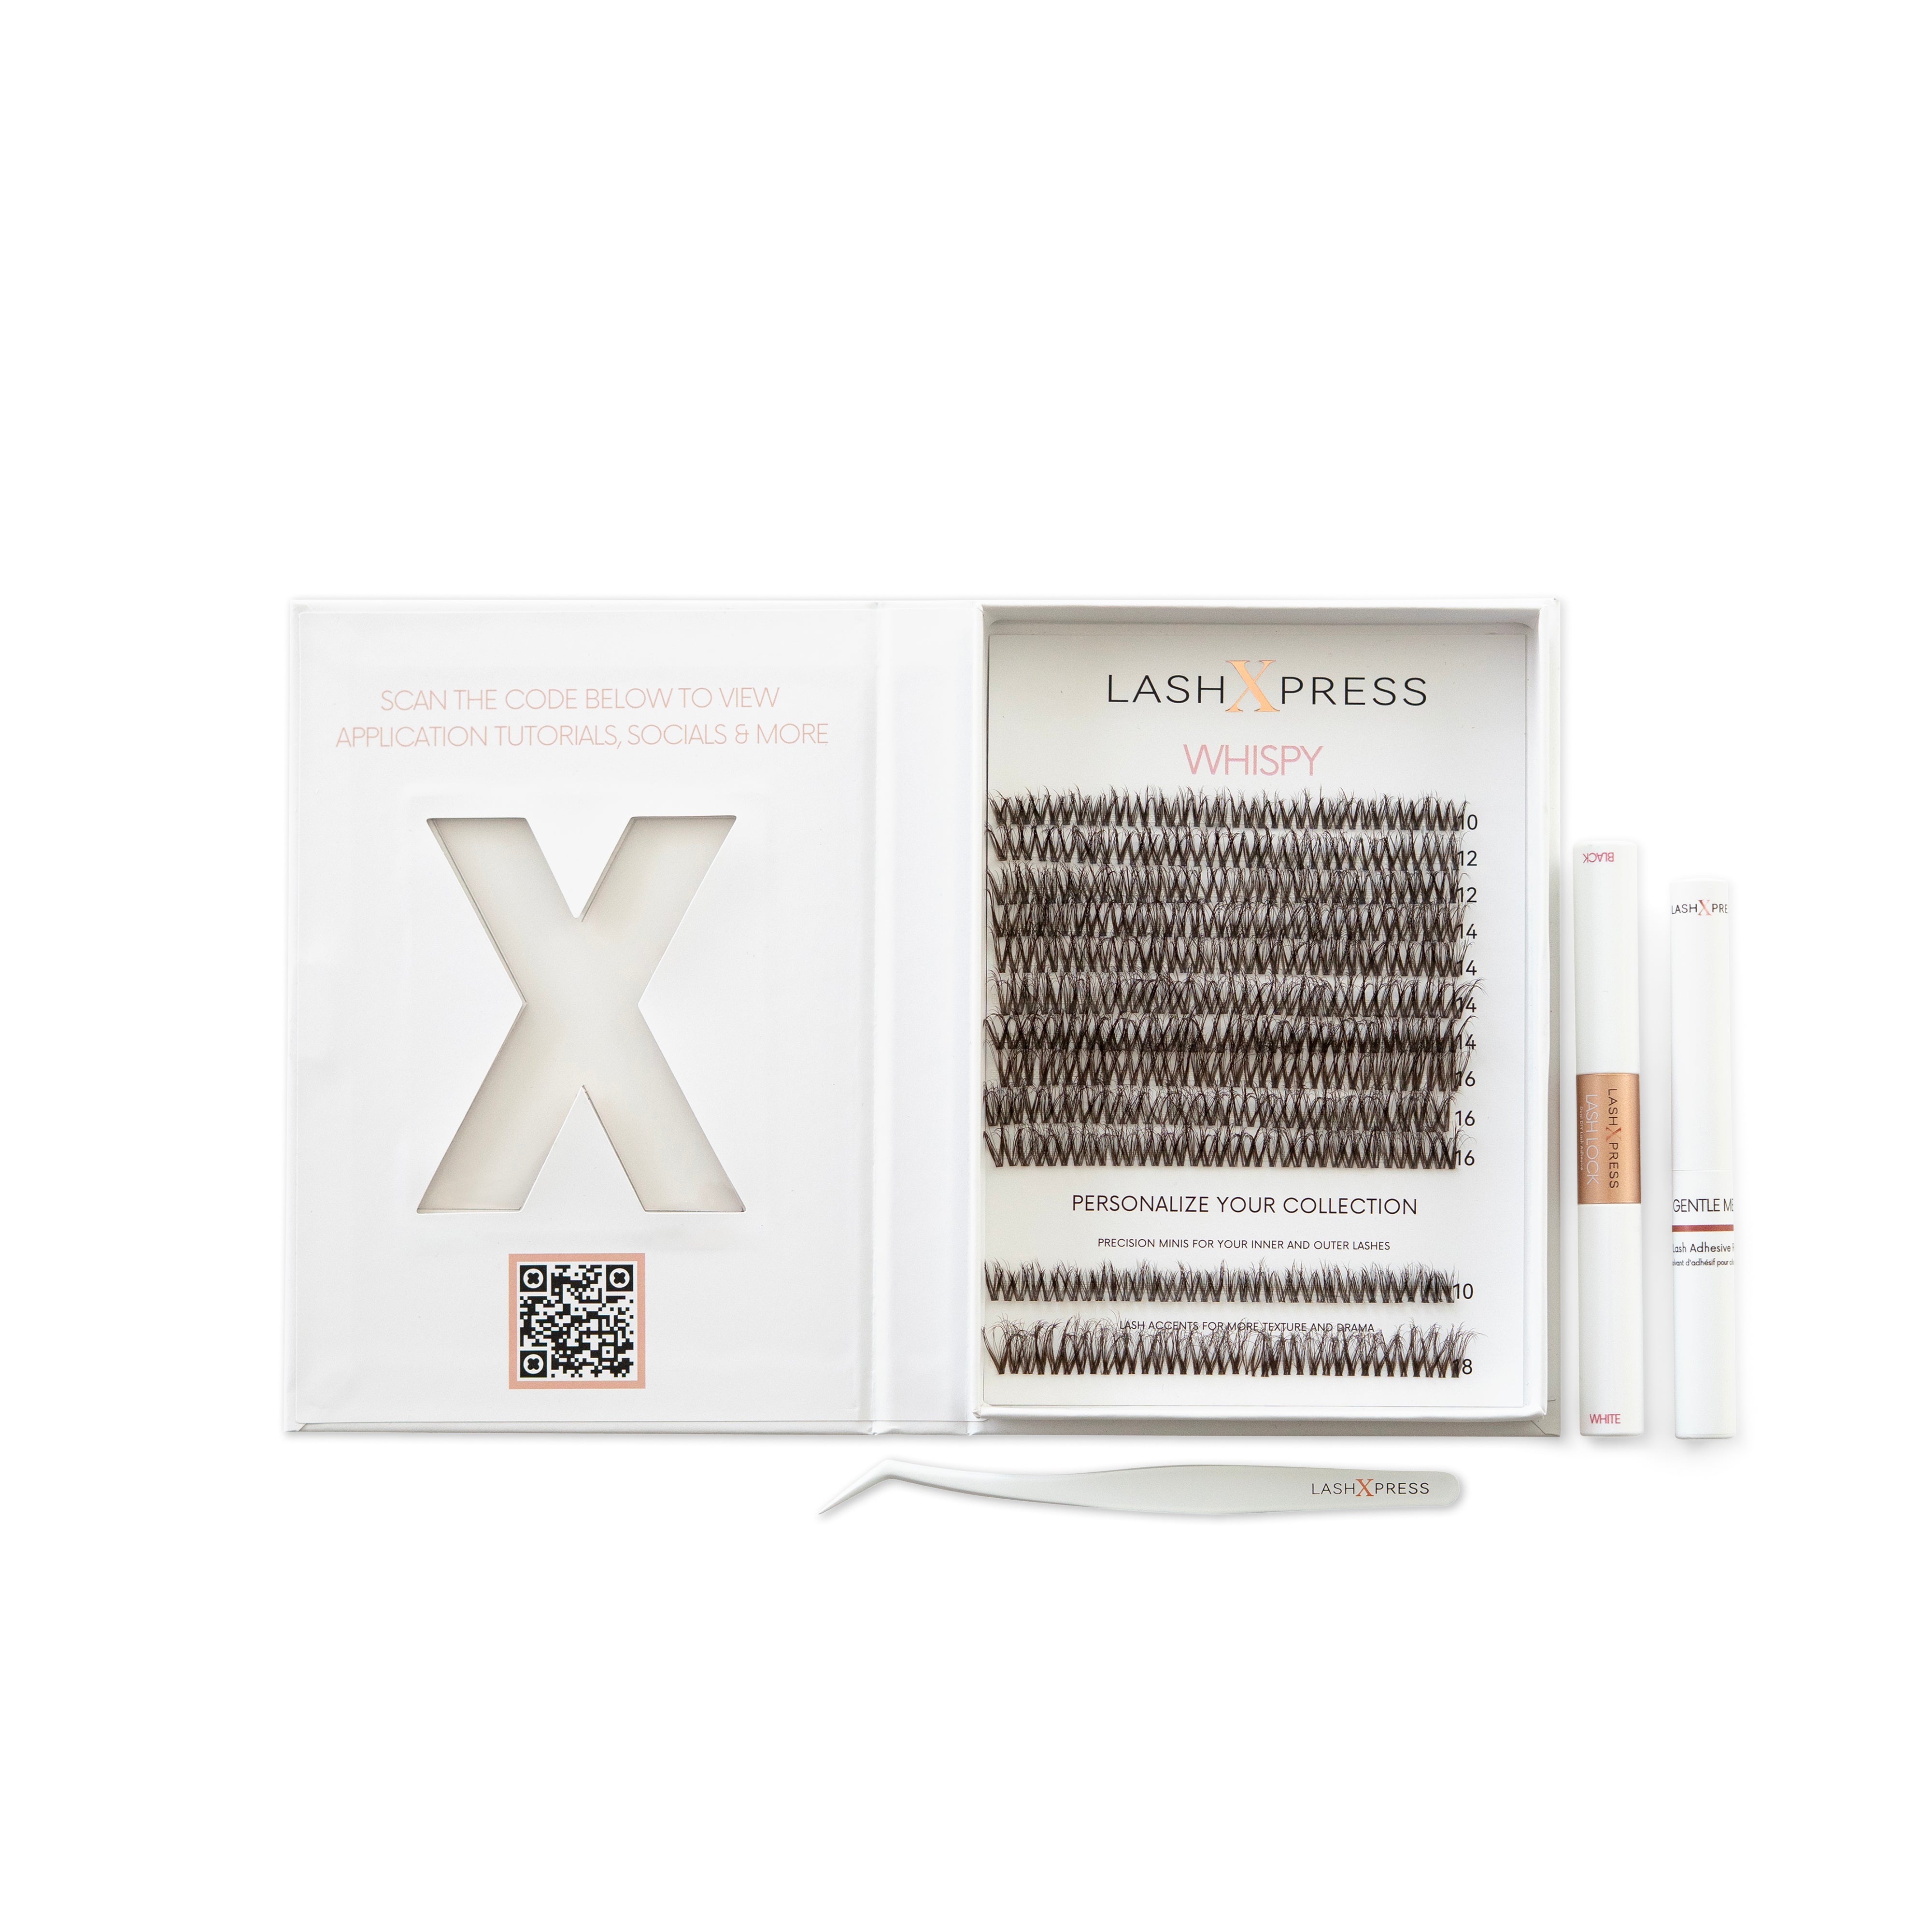
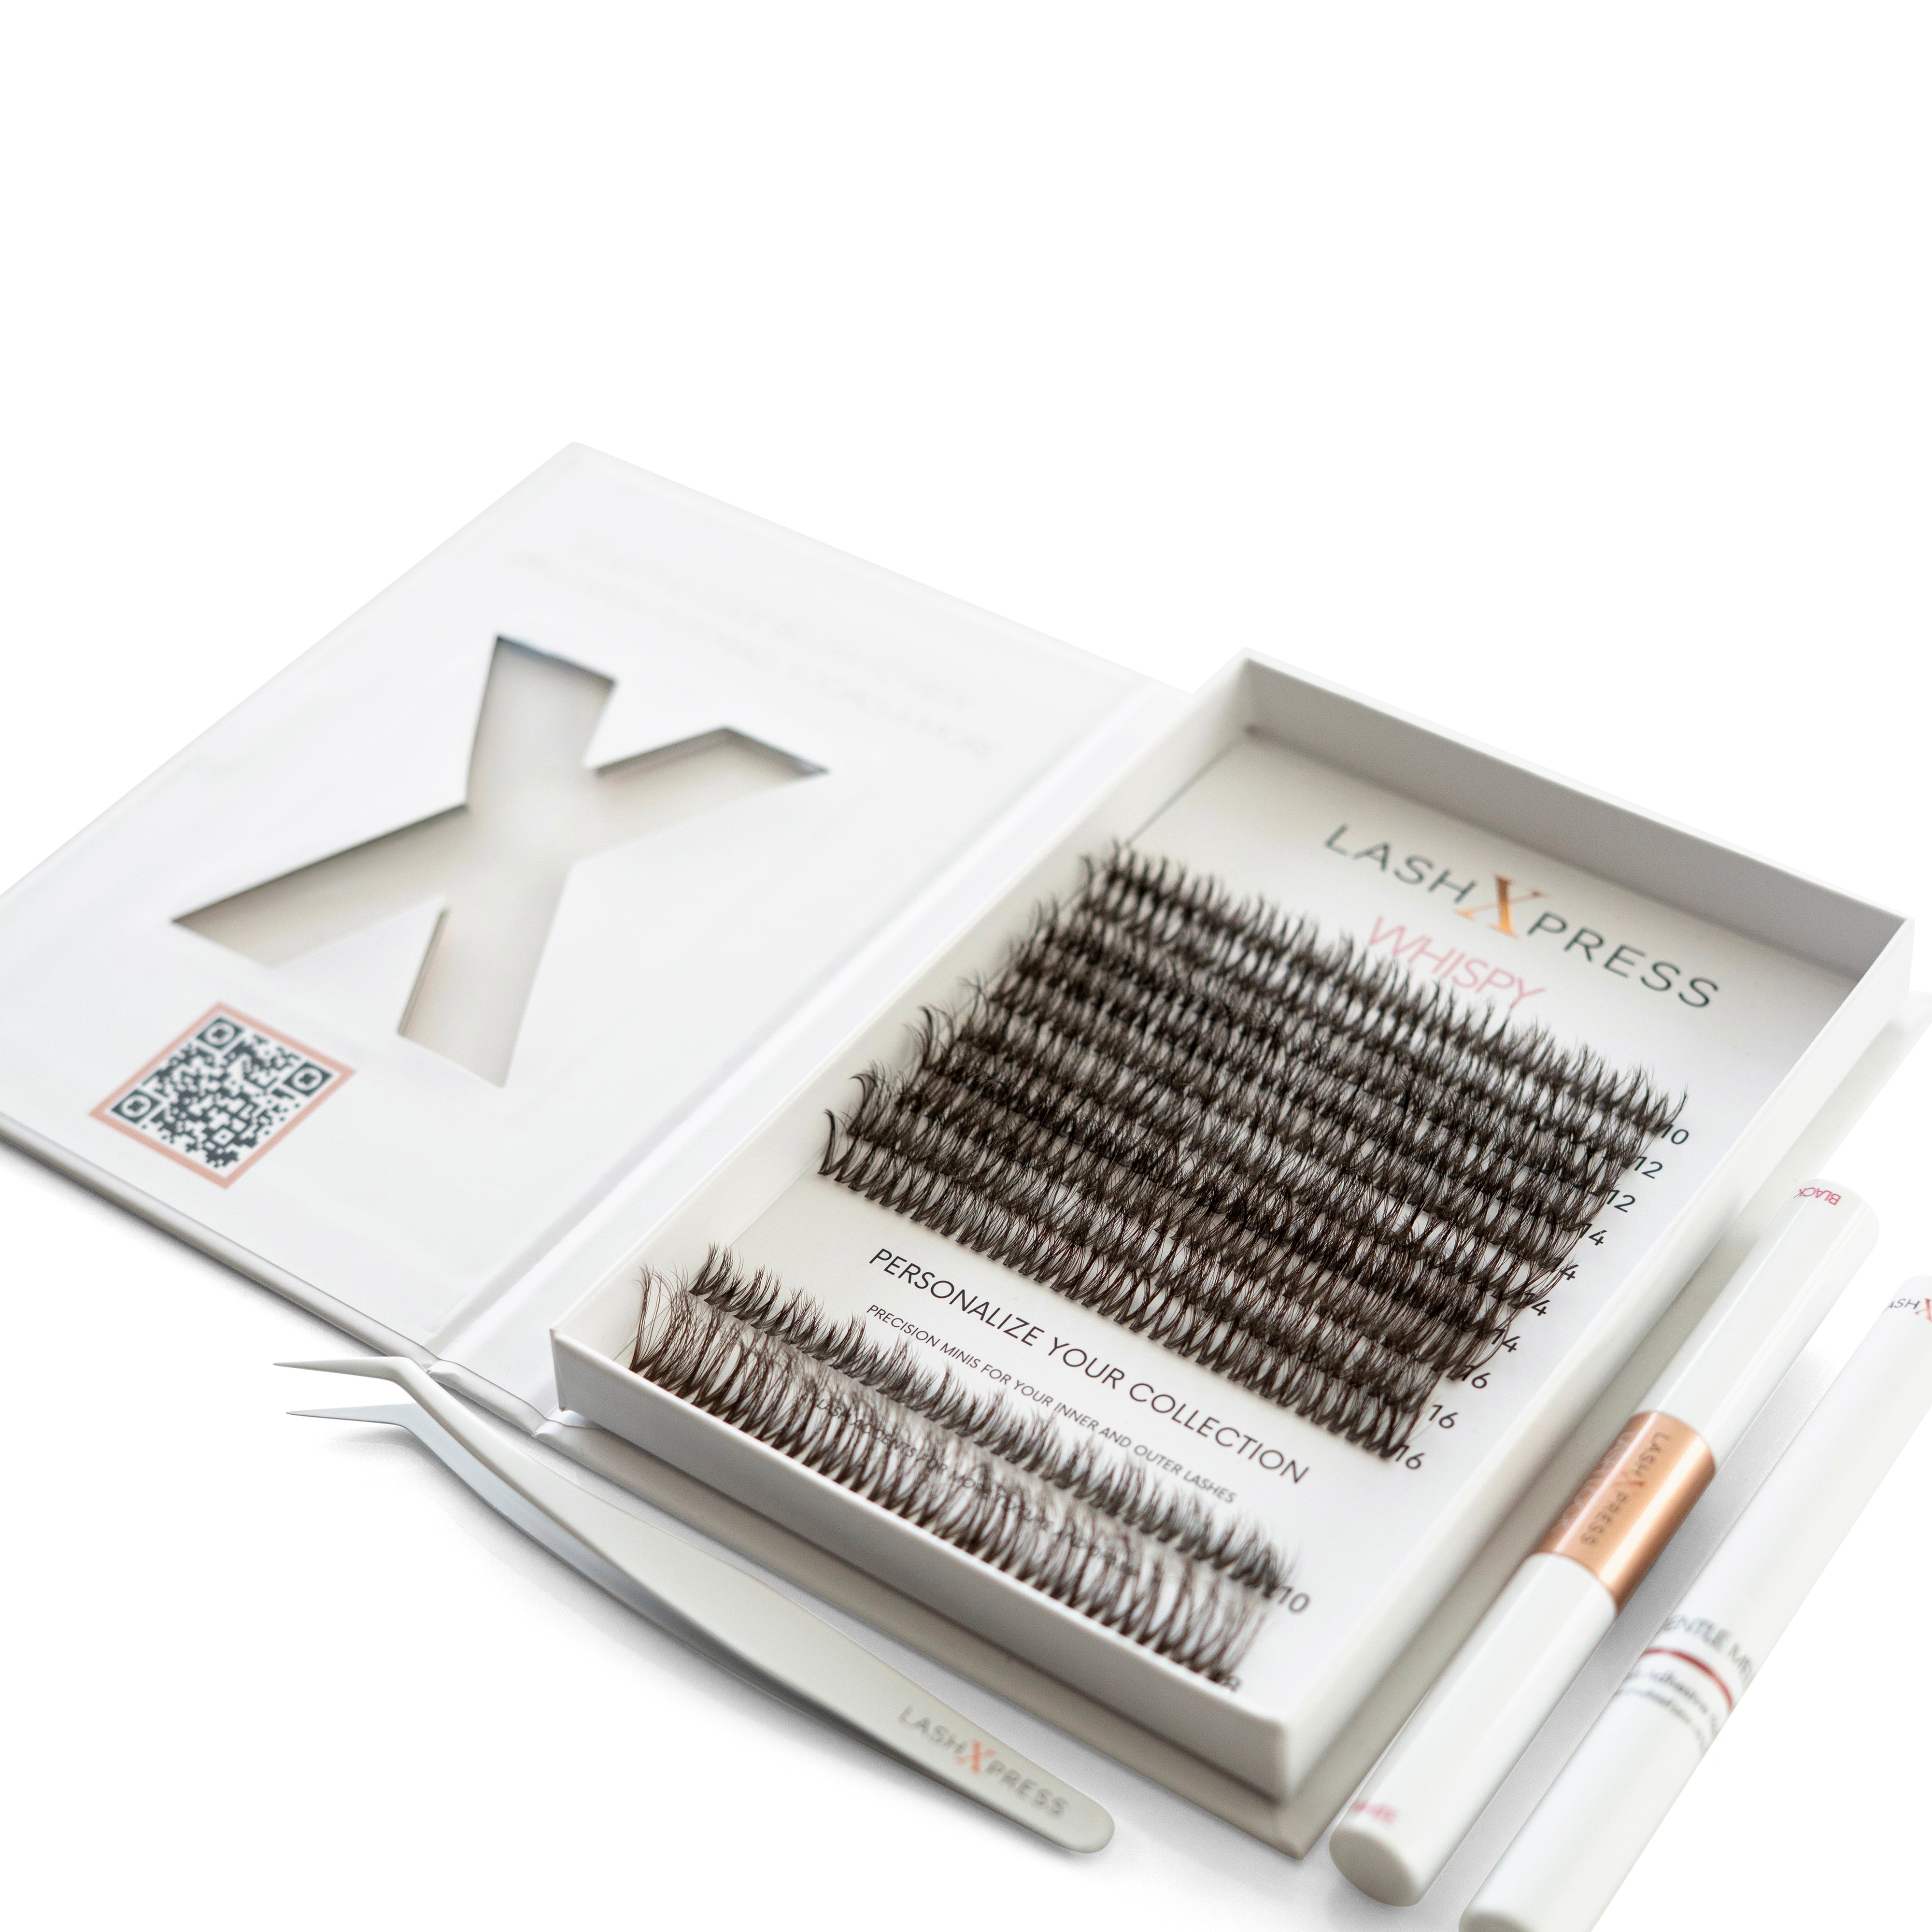
Elevate your beauty routine with our all-in-one DIY Lash Bundle, thoughtfully curated to bring luxury and convenience to your fingertips. This bundle includes:

DIY Lash Tray: Choose your perfect lash style—from natural to dramatic—for a flawless, customizable look.

Lash Lock Dual Bond Adhesive: Our revolutionary glue features two ends—black for bold definition and white for seamless precision—paired with two unique brushes for ultimate control.

Artisan Grip Tweezer: Designed for precision and ease, this anti-static tweezer ensures effortless application every time.

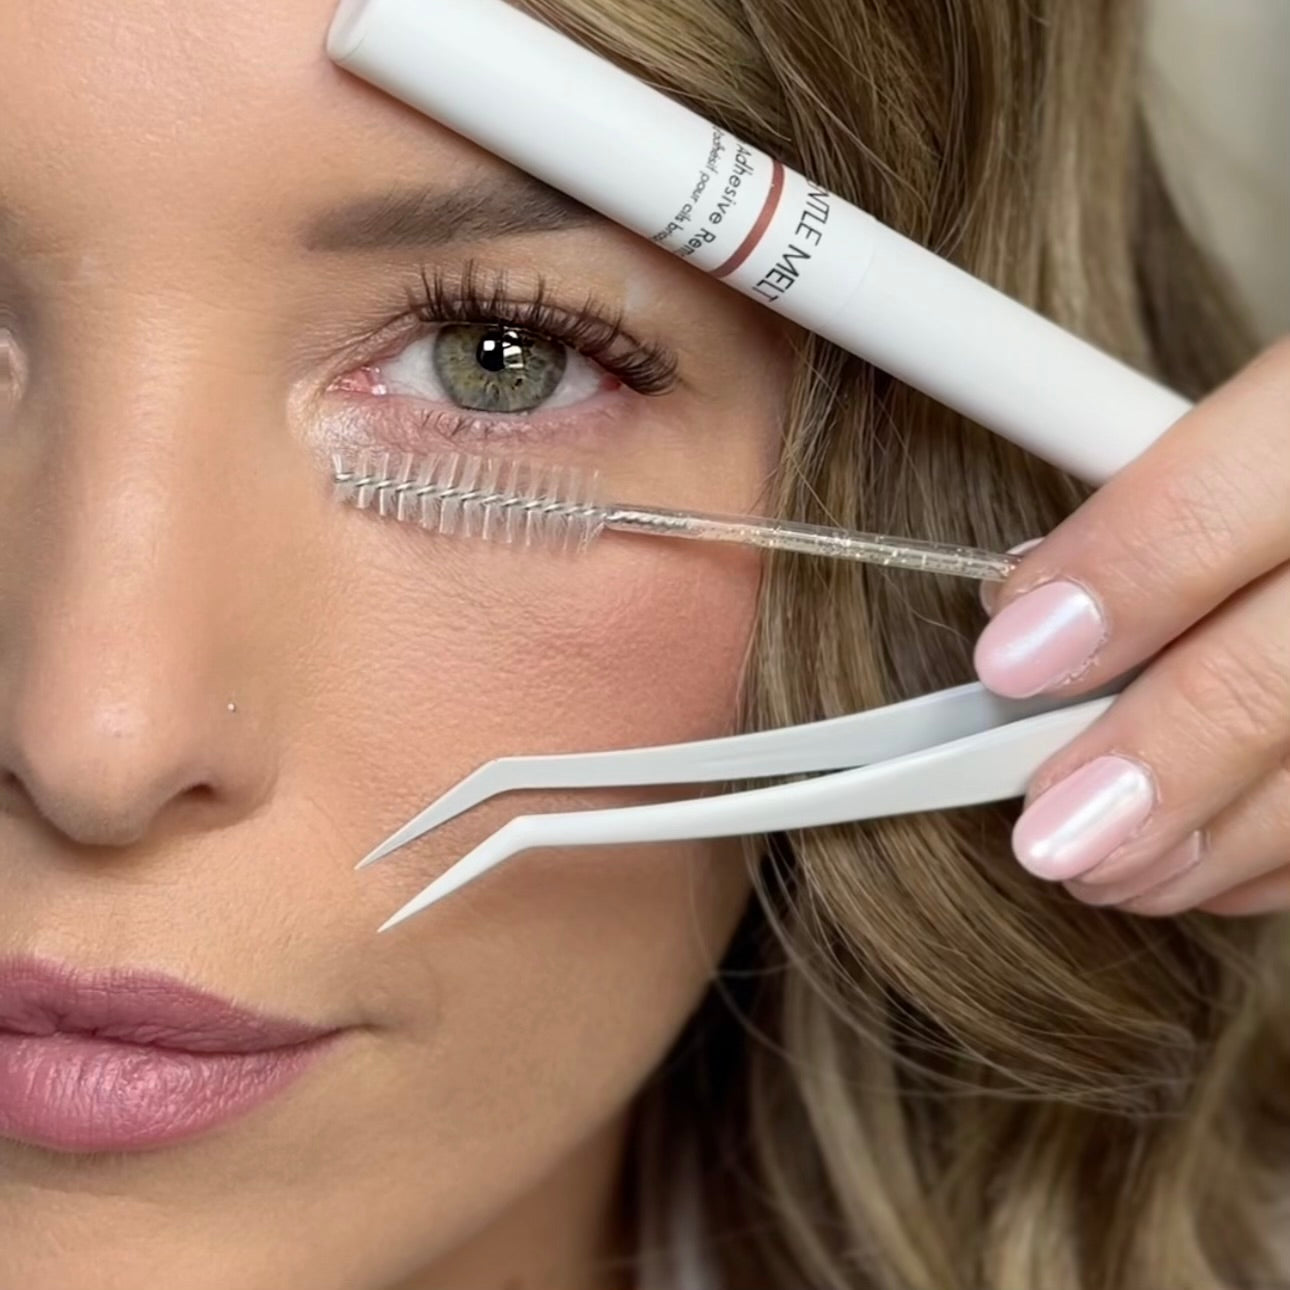
Gentle Melt Remover: A soothing, effective formula to safely remove your lashes while protecting your natural ones.

With everything you need in one luxe package, the DIY Lash Bundle is your key to salon-quality lashes at home. Perfect for any occasion, this bundle simplifies beauty, giving you confidence that lasts 5-7 days. Experience effortless elegance—your way.

Features

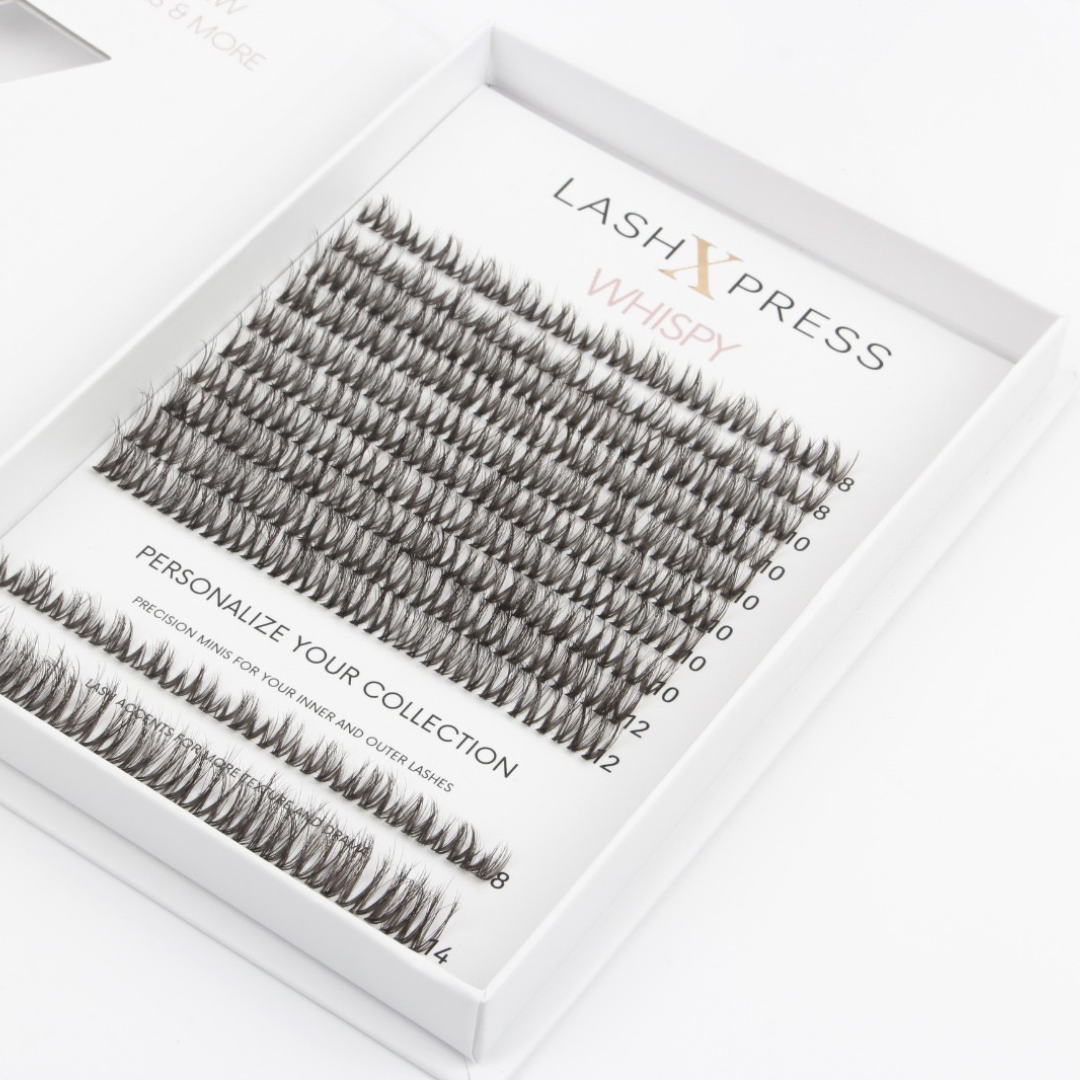
• Available in both Short Length Tray (8mm, 10mm, 12mm)

• Long Length Tray (10mm, 12mm, 14mm, 16mm) trays

• Includes Precision Minis included both length trays for inner and outer corners.

• Thickest density of all three collections

• Stronger base and mid-segment for deeper definition

• Ultra-thin band = no weight, no irritation

• Espresso-brown finish for bold without looking harsh

• 12–15 sets per tray

• Reusable and durable

This set is for the bold, the unapologetic, and the glam-at-heart. It’s high-impact, low-effort beauty — and we’re obsessed.

Flash Lash Application

Get ready to achieve salon-quality lashes in the comfort of your home with our easy-to-follow application process. Whether you’re a first-timer or an experienced DIY lash enthusiast, this step-by-step guide will simplify everything.

What You’ll Need:

Your LashXpress lashes

Dual-Ended Lash Bond

Anti-Stick Lash Tweezers

Gentle Melt Remover (for care and removal)

Step-by-Step Lash Application

1. Prep Your Natural Lashes:

Start with clean, dry, and oil-free lashes. Remove any makeup or oils with a gentle, oil-free cleanser.

2. Choose Your Lash Style:

Select the lash segments that suit your desired look, from natural to bold.

3. Apply White or black Bond:

Use the fine-tip applicator of the white bond to apply a thin line along your natural lash line. Be precise; this is where your lash segments will adhere. Allow bond to set on the lashes for 20 seconds prior to application.

5. Place Your Lash Segments: be sure to ensure the bond is tacky prior to application.

Starting with the outer corner of your eye, use the Anti-Stick Tweezers to pick up a lash segment and gently place it underneath your natural lashes at the lash line.

Repeat with additional segments until you achieve your desired look, working your way toward the inner corner.

6. Secure the Lashes:

Press the lash segments and your natural lashes together with the tweezers to lock them in place. Pro Tip: run tweezers under water prior to clamping. The water helps seal the bond and helps with any stickiness.

7. Final Touches:

If needed, use the tweezers to adjust the lashes for a seamless, natural look.

Flash Lash Removal

Keeping your lashes clean and cared for ensures longer wear and healthier natural lashes. Follow these steps for safe and easy removal:

What You’ll Need:

Gentle Melt Remover

Anti-Stick Tweezers

1. Prepare the Remover:

Use the Gentle Melt applicator to apply the remover to the base of your lashes. Make sure to coat both the top and underside of the lash line.

2. Wait 3 Minutes:

Allow the remover to sit for 3 minutes. This gives it time to gently break down the bond without tugging or irritation.

3. Remove the Lashes:

Gently slide the lash segments off your natural lashes using the Anti-Stick Tweezers or your fingers. If any bond remains, repeat the remover application.

4. Cleanse Your Lashes:

Wash your natural lashes with a gentle, oil-free cleanser to remove any residue and keep your lashes clean.

How to Care for Your Flash Lashes

1. Reuse Your Lash Segments:

Remove any excess bond from the lash bands using the Gentle Melt and store the segments in their original tray to maintain their shape.

2. Clean Your Tweezers:

If bond builds up on your tweezers, wash them with soap and warm water (no acetone) to preserve the anti-stick coating.

3. Avoid Oils:

Keep oil-based products away from your lashes and bond to maintain adhesion and prolong wear.

Pro Tips for Success

Practice makes perfect—start with a natural style if you’re new!

For even longer wear, avoid sleeping on your face or using oil-based skincare near your eyes.

Keep your Gentle Melt and Lash Bond handy for touch-ups and removal.

Turn heads without saying a word.

Our Bold Collection delivers rich texture, defined volume, and full-body glam — all without sacrificing comfort. Designed for the beauty lover who wants that extra moment.

Features

• Available in both Short Length Tray (8mm, 10mm, 12mm)

• Long Length Tray (10mm, 12mm, 14mm, 16mm) trays

• Includes Precision Minis included both length trays for inner and outer corners.

• Thickest density of all three collections

• Stronger base and mid-segment for deeper definition

• Ultra-thin band = no weight, no irritation

• Espresso-brown finish for bold without looking harsh

• 12–15 sets per tray

• Reusable and durable

This set is for the bold, the unapologetic, and the glam-at-heart. It’s high-impact, low-effort beauty — and we’re obsessed.

Flash Lash Application

Get ready to achieve salon-quality lashes in the comfort of your home with our easy-to-follow application process. Whether you’re a first-timer or an experienced DIY lash enthusiast, this step-by-step guide will simplify everything.

What You’ll Need:

Your LashXpress lashes

Dual-Ended Lash Bond

Anti-Stick Lash Tweezers

Gentle Melt Remover (for care and removal)

Step-by-Step Lash Application

1. Prep Your Natural Lashes:

Start with clean, dry, and oil-free lashes. Remove any makeup or oils with a gentle, oil-free cleanser.

2. Choose Your Lash Style:

Select the lash segments that suit your desired look, from natural to bold.

3. Apply White or black Bond:

Use the fine-tip applicator of the white bond to apply a thin line along your natural lash line. Be precise; this is where your lash segments will adhere. Allow bond to set on the lashes for 20 seconds prior to application.

5. Place Your Lash Segments: be sure to ensure the bond is tacky prior to application.

Starting with the outer corner of your eye, use the Anti-Stick Tweezers to pick up a lash segment and gently place it underneath your natural lashes at the lash line.

Repeat with additional segments until you achieve your desired look, working your way toward the inner corner.

6. Secure the Lashes:

Press the lash segments and your natural lashes together with the tweezers to lock them in place. Pro Tip: run tweezers under water prior to clamping. The water helps seal the bond and helps with any stickiness.

7. Final Touches:

If needed, use the tweezers to adjust the lashes for a seamless, natural look.

Flash Lash Removal

Keeping your lashes clean and cared for ensures longer wear and healthier natural lashes. Follow these steps for safe and easy removal:

What You’ll Need:

Gentle Melt Remover

Anti-Stick Tweezers

1. Prepare the Remover:

Use the Gentle Melt applicator to apply the remover to the base of your lashes. Make sure to coat both the top and underside of the lash line.

2. Wait 3 Minutes:

Allow the remover to sit for 3 minutes. This gives it time to gently break down the bond without tugging or irritation.

3. Remove the Lashes:

Gently slide the lash segments off your natural lashes using the Anti-Stick Tweezers or your fingers. If any bond remains, repeat the remover application.

4. Cleanse Your Lashes:

Wash your natural lashes with a gentle, oil-free cleanser to remove any residue and keep your lashes clean.

How to Care for Your Flash Lashes

1. Reuse Your Lash Segments:

Remove any excess bond from the lash bands using the Gentle Melt and store the segments in their original tray to maintain their shape.

2. Clean Your Tweezers:

If bond builds up on your tweezers, wash them with soap and warm water (no acetone) to preserve the anti-stick coating.

3. Avoid Oils:

Keep oil-based products away from your lashes and bond to maintain adhesion and prolong wear.

Pro Tips for Success

Practice makes perfect—start with a natural style if you’re new!

For even longer wear, avoid sleeping on your face or using oil-based skincare near your eyes.

Keep your Gentle Melt and Lash Bond handy for touch-ups and removal.

Pairs well with

Frequently Asked Questions

DIY LASHXPRESS is a luxury at-home lash experience designed for modern women who want salon-quality results in minutes. Our espresso-brown lashes are softer and more natural than traditional black, and our tools and formulas are designed with lash health in mind.

Yes! All of our products are developed with clean, gentle ingredients, and our bond is latex-free and safe for most sensitive eyes. However, we always recommend a patch test before full application.

Our FlashLashes are designed to last 5–7 days when applied properly using our DIY LASHXPRESS bond and seal system. We recommend removing them after that window to maintain the health of your natural lashes.

It’s easy! Apply bond to your natural lashes, press on your chosen clusters to the bottom or top of the lash line, then seal. 

Yes! Our lashes are water-resistant and sleep-friendly. Just avoid excessive steam and oil-based products near the eyes to extend wear.

Use our remover or a gentle oil-based cleanser. Let it sit for a few seconds, then gently slide the clusters off. Never tug or pull to avoid damaging your natural lashes.

• Natural: Soft, subtle, everyday glam

• Whispy: Feathery, fluttery, romantic vibes

• Bold: Dramatic, full-volume statement lashes

Take our Lash Quiz to find your perfect match!

The Ultimate DIY Lash Bundle

Elevate your beauty routine with our all-in-one DIY Lash Bundle, thoughtfully curated to bring luxury and convenience to your fingertips. This bundle includes:

DIY Lash Tray: Choose your perfect lash style—from natural to dramatic—for a flawless, customizable look.

Lash Lock Dual Bond Adhesive: Our revolutionary glue features two ends—black for bold definition and white for seamless precision—paired with two unique brushes for ultimate control.

Artisan Grip Tweezer: Designed for precision and ease, this anti-static tweezer ensures effortless application every time.

Gentle Melt Remover: A soothing, effective formula to safely remove your lashes while protecting your natural ones.

With everything you need in one luxe package, the DIY Lash Bundle is your key to salon-quality lashes at home. Perfect for any occasion, this bundle simplifies beauty, giving you confidence that lasts 5-7 days. Experience effortless elegance—your way.

Features

• Available in both Short Length Tray (8mm, 10mm, 12mm)

• Long Length Tray (10mm, 12mm, 14mm, 16mm) trays

• Includes Precision Minis included both length trays for inner and outer corners.

• Thickest density of all three collections

• Stronger base and mid-segment for deeper definition

• Ultra-thin band = no weight, no irritation

• Espresso-brown finish for bold without looking harsh

• 12–15 sets per tray

• Reusable and durable

This set is for the bold, the unapologetic, and the glam-at-heart. It’s high-impact, low-effort beauty — and we’re obsessed.

Flash Lash Application

Get ready to achieve salon-quality lashes in the comfort of your home with our easy-to-follow application process. Whether you’re a first-timer or an experienced DIY lash enthusiast, this step-by-step guide will simplify everything.

What You’ll Need:

Your LashXpress lashes

Dual-Ended Lash Bond

Anti-Stick Lash Tweezers

Gentle Melt Remover (for care and removal)

Step-by-Step Lash Application

1. Prep Your Natural Lashes:

Start with clean, dry, and oil-free lashes. Remove any makeup or oils with a gentle, oil-free cleanser.

2. Choose Your Lash Style:

Select the lash segments that suit your desired look, from natural to bold.

3. Apply White or black Bond:

Use the fine-tip applicator of the white bond to apply a thin line along your natural lash line. Be precise; this is where your lash segments will adhere. Allow bond to set on the lashes for 20 seconds prior to application.

5. Place Your Lash Segments: be sure to ensure the bond is tacky prior to application.

Starting with the outer corner of your eye, use the Anti-Stick Tweezers to pick up a lash segment and gently place it underneath your natural lashes at the lash line.

Repeat with additional segments until you achieve your desired look, working your way toward the inner corner.

6. Secure the Lashes:

Press the lash segments and your natural lashes together with the tweezers to lock them in place. Pro Tip: run tweezers under water prior to clamping. The water helps seal the bond and helps with any stickiness.

7. Final Touches:

If needed, use the tweezers to adjust the lashes for a seamless, natural look.

Flash Lash Removal

Keeping your lashes clean and cared for ensures longer wear and healthier natural lashes. Follow these steps for safe and easy removal:

What You’ll Need:

Gentle Melt Remover

Anti-Stick Tweezers

1. Prepare the Remover:

Use the Gentle Melt applicator to apply the remover to the base of your lashes. Make sure to coat both the top and underside of the lash line.

2. Wait 3 Minutes:

Allow the remover to sit for 3 minutes. This gives it time to gently break down the bond without tugging or irritation.

3. Remove the Lashes:

Gently slide the lash segments off your natural lashes using the Anti-Stick Tweezers or your fingers. If any bond remains, repeat the remover application.

4. Cleanse Your Lashes:

Wash your natural lashes with a gentle, oil-free cleanser to remove any residue and keep your lashes clean.

How to Care for Your Flash Lashes

1. Reuse Your Lash Segments:

Remove any excess bond from the lash bands using the Gentle Melt and store the segments in their original tray to maintain their shape.

2. Clean Your Tweezers:

If bond builds up on your tweezers, wash them with soap and warm water (no acetone) to preserve the anti-stick coating.

3. Avoid Oils:

Keep oil-based products away from your lashes and bond to maintain adhesion and prolong wear.

Pro Tips for Success

Practice makes perfect—start with a natural style if you’re new!

For even longer wear, avoid sleeping on your face or using oil-based skincare near your eyes.

Keep your Gentle Melt and Lash Bond handy for touch-ups and removal.

Turn heads without saying a word.

Our Bold Collection delivers rich texture, defined volume, and full-body glam — all without sacrificing comfort. Designed for the beauty lover who wants that extra moment.

Features

• Available in both Short Length Tray (8mm, 10mm, 12mm)

• Long Length Tray (10mm, 12mm, 14mm, 16mm) trays

• Includes Precision Minis included both length trays for inner and outer corners.

• Thickest density of all three collections

• Stronger base and mid-segment for deeper definition

• Ultra-thin band = no weight, no irritation

• Espresso-brown finish for bold without looking harsh

• 12–15 sets per tray

• Reusable and durable

This set is for the bold, the unapologetic, and the glam-at-heart. It’s high-impact, low-effort beauty — and we’re obsessed.

Flash Lash Application

Get ready to achieve salon-quality lashes in the comfort of your home with our easy-to-follow application process. Whether you’re a first-timer or an experienced DIY lash enthusiast, this step-by-step guide will simplify everything.

What You’ll Need:

Your LashXpress lashes

Dual-Ended Lash Bond

Anti-Stick Lash Tweezers

Gentle Melt Remover (for care and removal)

Step-by-Step Lash Application

1. Prep Your Natural Lashes:

Start with clean, dry, and oil-free lashes. Remove any makeup or oils with a gentle, oil-free cleanser.

2. Choose Your Lash Style:

Select the lash segments that suit your desired look, from natural to bold.

3. Apply White or black Bond:

Use the fine-tip applicator of the white bond to apply a thin line along your natural lash line. Be precise; this is where your lash segments will adhere. Allow bond to set on the lashes for 20 seconds prior to application.

5. Place Your Lash Segments: be sure to ensure the bond is tacky prior to application.

Starting with the outer corner of your eye, use the Anti-Stick Tweezers to pick up a lash segment and gently place it underneath your natural lashes at the lash line.

Repeat with additional segments until you achieve your desired look, working your way toward the inner corner.

6. Secure the Lashes:

Press the lash segments and your natural lashes together with the tweezers to lock them in place. Pro Tip: run tweezers under water prior to clamping. The water helps seal the bond and helps with any stickiness.

7. Final Touches:

If needed, use the tweezers to adjust the lashes for a seamless, natural look.

Flash Lash Removal

Keeping your lashes clean and cared for ensures longer wear and healthier natural lashes. Follow these steps for safe and easy removal:

What You’ll Need:

Gentle Melt Remover

Anti-Stick Tweezers

1. Prepare the Remover:

Use the Gentle Melt applicator to apply the remover to the base of your lashes. Make sure to coat both the top and underside of the lash line.

2. Wait 3 Minutes:

Allow the remover to sit for 3 minutes. This gives it time to gently break down the bond without tugging or irritation.

3. Remove the Lashes:

Gently slide the lash segments off your natural lashes using the Anti-Stick Tweezers or your fingers. If any bond remains, repeat the remover application.

4. Cleanse Your Lashes:

Wash your natural lashes with a gentle, oil-free cleanser to remove any residue and keep your lashes clean.

How to Care for Your Flash Lashes

1. Reuse Your Lash Segments:

Remove any excess bond from the lash bands using the Gentle Melt and store the segments in their original tray to maintain their shape.

2. Clean Your Tweezers:

If bond builds up on your tweezers, wash them with soap and warm water (no acetone) to preserve the anti-stick coating.

3. Avoid Oils:

Keep oil-based products away from your lashes and bond to maintain adhesion and prolong wear.

Pro Tips for Success

Practice makes perfect—start with a natural style if you’re new!

For even longer wear, avoid sleeping on your face or using oil-based skincare near your eyes.

Keep your Gentle Melt and Lash Bond handy for touch-ups and removal.